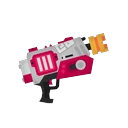
Rapid Blaster
A Blaster that trades one-shot power (85 on a direct hit, 35 from the blast) for long range and a faster fire rate. It's good at holding by keeping enemies away and chipping them down, and at backing up teammates, and it paints more than most Blasters. On the flip side, once enemies get in close you need two direct hits, so close-range fights are really rough.
Strength by modeTier and score (win-rate points vs. an average weapon).
| Mode | C–A | S–S+2 | S+3 and up | X Battle | Regular |
|---|---|---|---|---|---|
| Splat Zones | C -1.9 | C -2.4 | B -1.0 | C -2.7 | — |
| Tower Control | B -1.1 | C -2.1 | B -1.6 | B -1.9 | — |
| Rainmaker | C -2.9 | C -2.8 | C -2.3 | C -3.6 | — |
| Clam Blitz | -3.0 | -2.4 | -2.3 | -3.4 | — |
| Turf War | — | — | — | — | -6.2 |
Best stages / Worst stages
Splat Zones
Tower Control
Rainmaker
Clam Blitz
Turf War
Strengths
- Long range, and blasts easily damage enemies behind cover or at their feet
- Fast fire rate and short end lag for a Blaster, so it's great at zoning and hitting enemies from the side while they fight your teammates
- Land one direct hit and you can finish with blasts, and the fairly fast shots make direct hits easier to land
- With the base version, an enemy who steps on your Ink Mine can be splatted with one direct hit, which is strong on defense and when holding the Tower
- Relatively good painting and ink efficiency for a Blaster, so it builds special easily
Watch out for
- It can't one-shot, so its TTK is slow and it has little chance once enemies close in (the JP wiki says it's even worse up close than a Charger)
- Bad at pushing in on its own, so it struggles to break holds where you need to clear out the enemy
- Fighting longer-range enemies like Chargers and Splatlings head-on is a losing matchup
- In tight spaces surrounded by walls, blasts get eaten by the walls and deal less damage
- Struggles against mobile Shooters and Dualies, and against enemies who close in behind a Torpedo
Tips
- Manage your distance so enemies stay at the tip of your range, and back off right away if they're about to get in close
- After a direct hit, shoot at the enemy's feet to finish them with a blast. When your reticle changes shape, you're within direct-hit range
- Mix in an ink refill or a position change every 3 shots or so to keep up the pressure without running dry
- Always keep your Ink Mine placed near you, on flank routes, or around the Tower to be ready for sudden approaches
Common gear
Swim Speed Up, Intensify Action, Ink Saver (Sub), Sub Power Up, Ink Recovery Up, Special Power Up, Stealth Jump, Ink Resistance UpThis kit
A defensive kit: Ink Mine blocks flanks and adds damage (an enemy who triggers it can be splatted with one direct hit), and Triple Inkstrike breaks up enemy specials and entrenched positions.Recent changes
- 11.0.0: System change for all weapons: main weapons get bigger hitboxes against players (the shorter the range, the bigger the boost), squid form gets a smaller hurtbox, and the game adds "Flow Aura" (a temporary power-up when you keep performing well) plus a remaining-health display (source 8)
- 11.0.1: Main weapon (all Blasters): fixed a bug that made the small blast from shots hitting terrain slightly bigger than intended (source 9)
- 11.0.1: Main weapon: paint radius of ink droplets up by about 10% (source 9)
- 11.2.0: Main weapon (all Blasters): blast hitbox against players reduced (source 10)