Hagglefish Market
A medium-sized stage with few obstacles and clear sightlines. The center is a head-on fight, walled off on the left and right by tall walls you can't climb, but side paths on both flanks link your base and the enemy's, so flanking actually works here, which is rare for a new Splatoon 3 stage. The semi-transparent tent roofs on your side are a strong long-range spot that overlooks the center, but you can't paint on top of the roofs.
Splat Zones
Zones tips
- The zone is walled off on the left and right, so it tends to be a head-on fight. Whether your long-range weapon can hold the near tent roof decides the game.
- Always watch for flankers coming up the side paths. And when you get the chance, use the side paths yourself to hit the enemy from behind.
- The right side path is conspicuous because you have to jump from the slope to the grate to get around. On the left one you can stay hidden while painting along the wall.
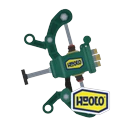 Custom Wellstring V★Weapons that shine here+3.7
pt C
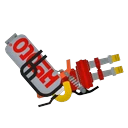 Hydra Splatling
Players say: With its long range and paint, it can hold the roof high ground where most weapons have a hard time touching it, which makes it hard for the other team to move.
★Weapons that shine here+2.3pt S
 Aerospray MG★Weapons that shine here+2.2
pt B
 S-BLAST '92★Weapons that shine here+2.0
pt B
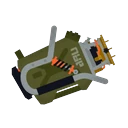 Explosher
Players say: Its arcing shots can hit over walls and onto the roofs, and it does well in the paint fight in the center (English-language guides also mention its strong painting).
★Weapons that shine here+1.9pt B
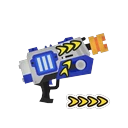 Rapid Blaster Deco★Weapons that shine here+1.8
pt C
 Painbrush NouveauWeapons that struggle here-3.1
pt A
 Octobrush NouveauWeapons that struggle here-2.8
pt C
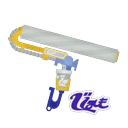 Big Swig Roller ExpressWeapons that struggle here-2.2
pt C
 Tri-Slosher NouveauWeapons that struggle here-2.2
pt
Tower Control
Tower tips
- The second checkpoint is the hottest fight. There's a lot of high ground around it, so save your specials, use them on enemies on the high ground, then push.
- Around the first checkpoint, the high ground on your left and the low ground in front are key to defending. Short-range weapons need to hold the low ground or the Tower is hard to stop.
- The third checkpoint is very close to the goal, so focus on stopping them at the second checkpoint.
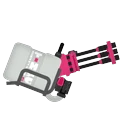 Heavy Splatling★Weapons that shine here+1.3
pt C
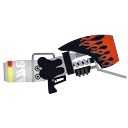 Range Blaster
Players say: Its blasts easily chase off backliners camping on the high ground (the tent roofs), and enemies on the roof have few places to run.
★Weapons that shine here+1.2pt C
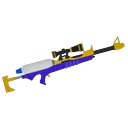 Splatterscope
Players say: From the tent roofs on your side, your line of fire reaches the center path and the side path exits, so the open sightlines make it easy to pick enemies off.
★Weapons that shine here+1.1pt A
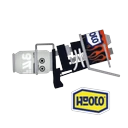 Custom Blaster★Weapons that shine here+1.0
pt
Rainmaker
Rainmaker tips
- If you take a running jump from the right checkpoint, you can land right on top of the slope, and it's nearly a straight line to the goal from there.
- The left route has lots of cover, making it easy for short-range weapons to lead the way, but it's far from the goal. Take whichever route the enemy isn't watching.
- On either route, clearing out long-range weapons on the enemy's high ground (like the tent roofs) is the top priority.
Clam Blitz
Clams tips
- Clams mostly spawn around the center, so gather in the center first.
- The shortest, straight-on route is standard. You can jump-throw over the fence into the basket from the bottom of the slope, but the angle is tight.
- Jumping from the edge of the tent roof and throwing will reach the basket, but you can't paint the roof and you're fully exposed, so it's high risk.
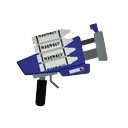
Turf War
Turf tips
- Even if you take the center, they'll come around through the side paths, so split up: for example, two in the center and the rest watching the left and right paths.
- Long-range weapons are strong watching the center from the tent roofs on your side. But you can't paint the roof and you're vulnerable to bombs, so keep an eye on your ink and your footing.
- Short-range weapons should flank through the side paths and pinch the enemies in the center.
Hydra SplatlingPlayers say: With its long range and paint, it can hold the roof high ground where most weapons have a hard time touching it, which makes it hard for the other team to move.
★Weapons that shine here+1.0pt B
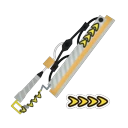 Splatana Wiper DecoWeapons that struggle here-1.4
pt C
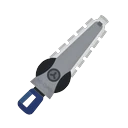 Splatana StamperWeapons that struggle here-1.3
pt
Update changes
- Ver. 3.0.0: Terrain changed in Turf War, Splat Zones and Clam Blitz to reduce the impact of weapons that shoot from long range (confirmed via old map labels on Inkipedia and the JP wiki).
- Ver. 8.0.0: Small terrain changes in all modes (confirmed via old map labels on Inkipedia and the JP wiki).
- We couldn't find clear info on how player opinion changed after the rework.