リュウグウターミナルLemuria Hub
Lemuria Hub
A symmetrical stage modeled on Kyoto Station. The three hot spots are the high ground on your side, the low center, and the center bridge (high ground). The bridge and the slopes on each side have moving floors that carry you and your placed objects along or make them vanish. With little cover and open sightlines, long-range weapons and Trizooka hit easily. Spawn is far from the center, so as long as you don't get pushed back to your own slope, there's still room to break the hold. Players really dislike the moving floors.
SymmetricalFour moving floors (they carry you and placed objects, or make them vanish)Open sightlines, little coverFights over the center bridge (high ground)Bowl-shaped, so it's easy to get shot from aboveSpawn is far from the center
Splat Zones
Zones tips
- There are two zones. There's no base slope in this mode, so you can't push into the enemy base, and matches tend to turn into a tug-of-war. When you're ahead, set up in the center and put long-range weapons on the high ground.
- Take the bridge with the moving floor above the zones and you can pressure both zones and anyone approaching.
- Don't take on an E-liter on the center slope alone. Avoid its line of fire and close in with several teammates. Painting back one of the zones to slow the count also works.
B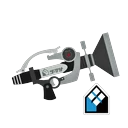 Neo Sploosh-o-matic★Weapons that shine here+3.0
pt B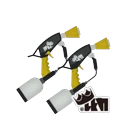 Enperry Splat Dualies★Weapons that shine here+2.6
pt A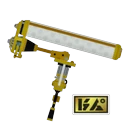 Gold Dynamo Roller★Weapons that shine here+2.0
pt A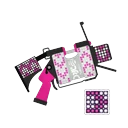 .52 Gal Deco★Weapons that shine here+1.8
pt S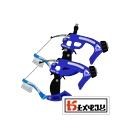 Dapple Dualies Nouveau★Weapons that shine here+1.8
pt B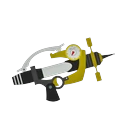 Splash-o-matic★Weapons that shine here+1.7
pt C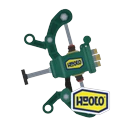 Custom Wellstring VWeapons that struggle here-3.5
pt D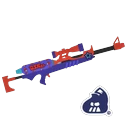 Z+F SplatterscopeWeapons that struggle here-2.8
pt A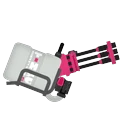 Heavy Splatling
pt A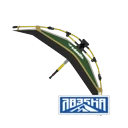 Tenta Sorella BrellaWeapons that struggle here-2.6
pt
Neo Sploosh-o-matic★Weapons that shine here+3.0pt B
Enperry Splat Dualies★Weapons that shine here+2.6pt A
Gold Dynamo Roller★Weapons that shine here+2.0pt A
.52 Gal Deco★Weapons that shine here+1.8pt S
Dapple Dualies Nouveau★Weapons that shine here+1.8pt B
Splash-o-matic★Weapons that shine here+1.7pt C
Custom Wellstring VWeapons that struggle here-3.5pt D
Z+F SplatterscopeWeapons that struggle here-2.8pt A
Heavy SplatlingPlayers say: Players say that once the center is taken there's nowhere to safely charge, so they don't stand a chance (others argue that's true on any stage).
Weapons that struggle here-2.8pt A
Tenta Sorella BrellaWeapons that struggle here-2.6pt
Tower Control
Tower tips
- The Tower starts on the center high ground, so take that first. It's easier to control if a teammate climbs the wall and goes for it from the near side.
- There's no cover around checkpoint 2, so the pushing team is favored. If they get past the slope beyond it, they'll roll all the way to checkpoint 3.
- After checkpoint 2 there's almost nowhere safe, so once you decide it's time to break the hold, build your specials early. Crab Tank and Trizooka also work well for taking control.

Rainmaker
Rainmaker tips
- Usually go for the checkpoint farther from your side. The near one is easy for enemies on the high ground to disrupt.
- After a checkpoint, ride the moving floor on the long slope straight to the goal. Teammates can help by placing Big Bubbler or Splash Wall on the slope.
- The slope at the final stretch draws focused fire, so combine specials and take it all at once.
Clam Blitz
Clams tips
- The low slope route is harder to disrupt and is the standard route (though you're attacking from low ground, so defenders tend to have the edge).
- On the center high ground route, clear out the enemies up there with specials and you can go straight to the basket.
- Every route passes through your own slope, so defending it is top priority.
Turf War
Turf tips
- Hold three spots: the high ground on your side, the low center, and the center bridge (high ground). A long-range weapon posted on the center high ground works well.
- Spawns are far apart and spawn camping is rare, so as long as you're not pushed back to your slope, you can break the hold. Hold that slope to the very end.
- Beakons, Sprinklers, and other objects placed in a moving floor's path will disappear, so put them on the floor itself or outside the area it moves through.
Update changes
- Newly added in Sizzle Season 2024 (2024/6/1).
- Ver. 9.0.0 (2024/8/30): fixed many bugs involving moving terrain (jumping off moving terrain to get into the enemy base, Ink Mines placed on the edge vanishing right away, not being able to pick up nearby clams, and more).
- Ver. 9.3.0: fixed a count-related bug when grabbing the Rainmaker below a ledge while dropping down from above.
- Ver. 10.0.0: fixed a bug that let players get into the enemy base from the center moving terrain with Ultra Stamp.
- The terrain itself hasn't been reworked, and as of 2026 players still complain with lines like "get rid of the moving floors" and "they should work like conveyor belts."