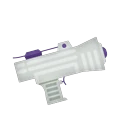
Splattershot Jr.
The starter weapon, with some of the best paint and ink efficiency in the game. It's bad at fights, so its job is to spam its sub thanks to its bigger, unique ink tank while supporting teammates with paint and its special. The base Splattershot Jr. runs Splat Bomb + Big Bubbler, and the Custom Splattershot Jr. runs Torpedo + Wave Breaker for a disruption-focused kit.
Strength by modeTier and score (win-rate points vs. an average weapon).
| Mode | C–A | S–S+2 | S+3 and up | X Battle | Regular |
|---|---|---|---|---|---|
| Splat Zones | S +4.0 | S +3.4 | A +2.5 | S +2.2 | — |
| Tower Control | S +2.3 | A +1.9 | A +1.1 | A +1.9 | — |
| Rainmaker | B -0.1 | B +0.3 | B -0.6 | B -0.4 | — |
| Clam Blitz | A +1.2 | B +1.0 | B -0.4 | B +0.4 | — |
| Turf War | — | — | — | — | C -3.0 |
Best stages / Worst stages
Splat Zones
Tower Control
Rainmaker
Clam Blitz
Turf War
Strengths
- Very low ink use, and its bigger unique ink tank lets it keep painting for a long time
- Shots spread wide, so you cover lots of ground at once and charge your special quickly
- With plenty of spare ink you can spam your sub, and Splat Bomb covers splats, zoning, and clearing
- Lightweight and nimble, so it's easy to play the objective or get out of danger
- Shots can land even if your aim is a little off, so even beginners can reliably contribute with paint
Watch out for
- Big spread and short range mean it loses most head-on fights
- Reliable splats need almost point-blank range, so mid- and long-range weapons that outrange it tend to push it around
- Big Bubbler is a defensive special for locking in a lead and doesn't have much power to break holds
- Its paint makes it stand out, so enemies target it and it often gets splatted first when it matters most
- Specials that pop bubbles easily, like Ultra Stamp, Reefslider, Booyah Bomb, and Triple Inkstrike, can shut down your trump card
Tips
- Avoid 1v1s. Stay a step behind teammates painting footholds, and cover them with your main or bombs the moment they start trading shots
- Decide whether each bomb is "to zone" or "to go for the splat." If throwing one gives away your position, don't chase. Back off right away
- Over-painting your side or theirs takes away space where teammates build special, so prioritize painting the front line and the enemy's routes in
- Place Big Bubbler where it protects teammates on objectives or using high-risk specials: on the Tower, just in front of the zone, in front of the clam basket, and so on. It won't fully expand under low ceilings, so watch out
Common gear
Ink Saver (Sub), Ink Recovery Up, Sub Power Up, Special Charge Up, Last-Ditch Effort, Swim Speed Up, Special Saver, Quick Super JumpThis kit
A support-leaning kit: Splat Bomb handles splats, zoning, and clearing, and the fast-charging Big Bubbler protects teammates around objectives like the Tower or the zone.Recent changes
- 11.0.0: System change for all weapons: main weapons get bigger hitboxes against players (the shorter the range, the bigger the boost), squid form gets a smaller hurtbox, and the game adds "Flow Aura" (a temporary power-up when you keep performing well) plus a remaining-health display (source 11)