チョウザメ造船Sturgeon Shipyard
Sturgeon Shipyard
A returning stage from Splatoon 2, set on a ship that's still under construction. Your side is big with lots of high ground, so long-range weapons that can watch the whole middle from a perch really shine. The drawbridge near the middle tilts over time: when it stands up, it becomes a path onto the enemy's high ground, and when it drops, it becomes a handy sniping platform. There are only a few ways into the enemy base, like unpaintable slopes, so pushing in and pushing back are both tough.
Lots of high ground and great sniping spotsYour side is big, so it's easy to leave spots unpaintedThe drawbridge moves and changes the layoutEasy to fall through holes and gratesFew routes into the enemy baseMany players say it favors long range and is rough on short range
Splat Zones
Zones tips
- The zone is made up of the central high ground and the slopes on either side, so sightlines are poor. Use the box-shaped blocks as cover while you fight.
- To hold the zone, defend the central high ground on your side at all costs. When you're attacking, go take the high ground on the enemy's side.
- While the drawbridge is up, frontliners can get onto the high ground more easily. Long-range players should plan an escape route.
A Octobrush Nouveau★Weapons that shine here+3.8
pt C Painbrush Nouveau★Weapons that shine here+3.5
pt C Tri-Slosher Nouveau★Weapons that shine here+3.5
pt B Splat Roller★Weapons that shine here+3.2
pt C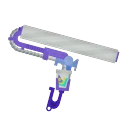 Big Swig Roller★Weapons that shine here+3.1
pt S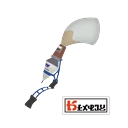 Inkbrush Nouveau★Weapons that shine here+3.1
pt C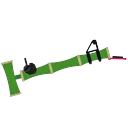 Bamboozler 14 Mk IWeapons that struggle here-5.2
pt D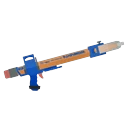 Snipewriter 5HWeapons that struggle here-4.9
pt C E-liter 4K ScopeWeapons that struggle here-3.7
pt D Custom Goo TuberWeapons that struggle here-3.7
pt
Octobrush Nouveau★Weapons that shine here+3.8pt C
Painbrush Nouveau★Weapons that shine here+3.5pt C
Tri-Slosher Nouveau★Weapons that shine here+3.5pt B
Splat Roller★Weapons that shine here+3.2pt C
Big Swig Roller★Weapons that shine here+3.1pt S
Inkbrush Nouveau★Weapons that shine here+3.1pt C
Bamboozler 14 Mk IWeapons that struggle here-5.2pt D
Snipewriter 5HWeapons that struggle here-4.9pt C
E-liter 4K ScopeWeapons that struggle here-3.7pt D
Custom Goo TuberWeapons that struggle here-3.7pt
Tower Control
Tower tips
- Most of the route is easy to hit from the central high ground, so clear out the enemies up there first.
- Jump straight from the Tower onto the grate and you can get onto the high ground without using the drawbridge.
- The drawbridge only moves while the Tower is moving. Remember: stop the Tower and the drawbridge stops too.
Rainmaker
Rainmaker tips
- The standard route goes through the checkpoint on the front right. It's easy for teammates to follow, so you can push in as a full team.
- The left route, jumping from the center-left block onto the grate, is short but has nowhere to escape. Save it for a quick opening when enemies are bunched up in the middle or on the right.
- The drawbridge near the left checkpoint drops and becomes passable once you break through that checkpoint.
Clam Blitz
Clams tips
- The route through the enemy's high ground is the easiest way to score. Even if the drawbridge is down, you can get there by jumping onto the grate.
- The basket is close to the middle, so it's easy to miss someone sneaking in a power clam. Keep an eye on your surroundings when defending.
- On defense, don't let the enemy take your high ground in front of the basket. If they get it, they can push you in with little you can do about it.
Turf War
Turf tips
- Your side is big and full of ledges, so it's easy to leave spots unpainted. Everyone should make a point of painting home turf.
- The middle is in plain view of all the surrounding high ground. If the enemy has a Charger, don't hang around there; take the drawbridge on the enemy's side or the high ground near the middle instead.
- The only way into the enemy base is up unpaintable slopes, so only push in after you've wiped the enemy team and locked down the paint in the middle.
CSplat Roller★Weapons that shine here+1.2
pt B Octobrush★Weapons that shine here+1.1
pt A Dynamo Roller★Weapons that shine here+1.1
pt −Big Swig Roller★Weapons that shine here+1.1
pt D E-liter 4KWeapons that struggle here-1.3
pt C Hydra SplatlingWeapons that struggle here-1.3
pt D Goo TuberWeapons that struggle here-1.2
pt C Splattershot NovaWeapons that struggle here-1.1
pt
Splat Roller★Weapons that shine here+1.2pt B
Octobrush★Weapons that shine here+1.1pt A
Dynamo Roller★Weapons that shine here+1.1pt −
Big Swig Roller★Weapons that shine here+1.1pt D
E-liter 4KWeapons that struggle here-1.3pt C
Hydra SplatlingWeapons that struggle here-1.3pt D
Goo TuberWeapons that struggle here-1.2pt C
Splattershot NovaWeapons that struggle here-1.1pt
Update changes
- Splatoon 3 updates have only fixed bugs; no terrain changes were found (Inkipedia version history).
- Changes from Splatoon 2: the middle is almost the same, and the spawn point now sits on a new platform one level up (Inkipedia). The paintable wall on the right side of the drawbridge from the previous game was also removed (wikiwiki).